
使用WPvivid备份插件来数据传输,迁移之前把无用的插件全部删除
CORS-means Cross-Origin Resource Sharing (跨区域资源共享)
1.基于 Web 浏览器的机制,允许在访问主要来源时向其他来源发出请求
2.允许客户端在访问服务器的时候带上ORIGN的标头
3.Origin = Scheme(Protocol) + host(domain) + port
- Scheme(Protocol):Https://
- host(domain):www.example.com
- Port:80
4,在客户想服务端发出请求的情况
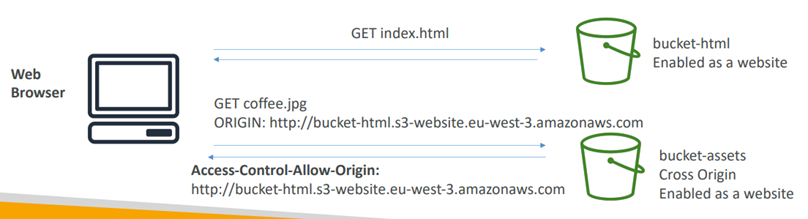
- 假设第一个S3是A,第二个S3是B,A中存有静态网站,B中存有图片,A有B的索引
- 当客户端向A发送请求后,A的Response会以网站界面呈现在面前
- 当客户端在网站上 点击指向B的Index的时候,发起的请求头中会有
- GET coffee.jpg
ORIGIN: http://bucket-html.s3-website.eu-west-3.amazonaws.com - 这个请求头ORIGIN
->如果浏览器不支持CORS,那么就不会有这个请求头 - B中设置有检查特定请求头,只有检查到被允许的请求头才会给出正确响应
二进制序列化
1.概要
- 二进制序列化对象时,
- 对象所对应的class必须被标记为[Serializable]
- 对象的所有字段的类型必须被标记为[Serializable]
- Object类默认被标记为可序列化
- 但是对象方法中存在未被标记的类型时,此类型不用标记[Serializable]
- 被标记序列化的类的字段如果不想被序列化,就标记[NonSerialized]
->但是必须标记到字段上,不能标记到属性上
2.代码
class Program
{
    static void Main()
    {
        People people = new People();
        people.age = 20;
        people.Name = "A";
        people.Email = "abc@qq.com";

        //二进制 序列化 就是把对象变成流的过程,把对象变成byte
        //创建序列化器
        //

        BinaryFormatter binaryFormatter = new BinaryFormatter();
        //开始执行序列化
        using (FileStream fs  = new FileStream("Person,bin",FileMode.Create))
        {
            binaryFormatter.Serialize(fs, people);
        }
        Console.WriteLine("序列化完毕");
    }

}

[Serializable]
public class People
{

    [NonSerialized]
    private string _name;
    public string Name
    {
        get { return _name; }
        set { _name = value; }
    }

    public int age { get; set; }
    public string Email { get; set; }
}
3.反序列化
反序列化的时候必须引用被序列化的类型所在的程序集
class Program
{
    static void Main()
    {
        People people = new People();
        people.age = 20;
        people.Name = "A";
        people.Email = "abc@qq.com";

        //二进制 序列化 就是把对象变成流的过程,把对象变成byte
        //创建序列化器
        //

        BinaryFormatter binaryFormatter = new BinaryFormatter();
        //开始执行序列化
        using (FileStream fs  = new FileStream("Person,bin",FileMode.Create))
        {
            binaryFormatter.Serialize(fs, people);
        }
        Console.WriteLine("序列化完毕");

        //反序列化
        using (FileStream bf = new FileStream("Person,bin",FileMode.Open))
        {
            object obj = binaryFormatter.Deserialize(bf);
            Console.WriteLine($"{((People)obj).Name},
                    {((People)obj).Email},{((People)obj).age}");
        }
    }
}

[Serializable]
public class People
{

    [NonSerialized]
    private string _name;
    public string Name
    {
        get { return _name; }
        set { _name = value; }
    }

    public int age { get; set; }
    public string Email { get; set; }
}
XMl序列化
代码
using System.Xml.Serialization;

class Program
{
    static void Main()
    {
        People people = new People();
        people.age = 20;
        people.Name = "A";
        people.Email = "abc@qq.com";

        //xml 序列化
        XmlSerializer xmlSerializer = new XmlSerializer(typeof(People)); ;
        using (FileStream fs = new FileStream("Person.xml",FileMode.Create))
        {
            xmlSerializer.Serialize(fs, people);
        }
        Console.WriteLine("Ok");

        Console.ReadLine();
    }

}
public class People
{
    public string Name { get; set; }
    public int age { get; set; }
    public string Email { get; set; }
}
输出
<?xml version="1.0" encoding="utf-8"?>
<People xmlns:xsi="http://www.w3.org/2001/XMLSchema-instance" xmlns:xsd="http://www.w3.org/2001/XMLSchema">
 <Name>A</Name>
 <age>20</age>
 <Email>abc@qq.com</Email>
</People>Json序列化
JsonSerializer
代码
Json序列化是将对象转化成字符串
using System.Text.Json;
class Program
{
    static void Main()
    {
        People people = new People();
        people.age = 20;
        people.Name = "A";
        people.Email = "abc@qq.com";

        //Json 序列化
        string a = JsonSerializer.Serialize(people);
        Console.WriteLine(a);
    }
}

public class People
{
    public string Name { get; set; }
    public int age { get; set; }
    public string Email { get; set; }
}
输出
{"Name":"A","age":20,"Email":"abc@qq.com"}对象序列化
1.序列化和反序列化
序列化 :叫格式化,将对象按照指定的格式存储的方式
反序列化:将序列化的文件还原
2.序列化
- 序列化只是序列化数据
- 序列化只是把对象的存储格式改变了,对象的实际内容没有改变
- 有序列化就有反序列化
3.例子
WordPress上传上限
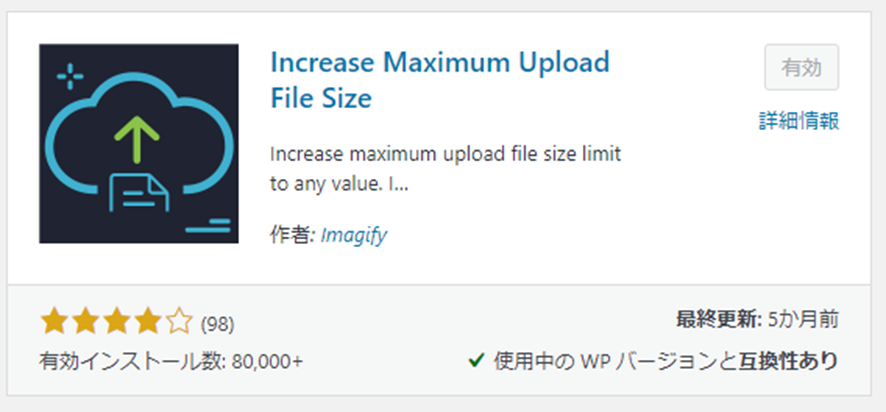
1、安装插件
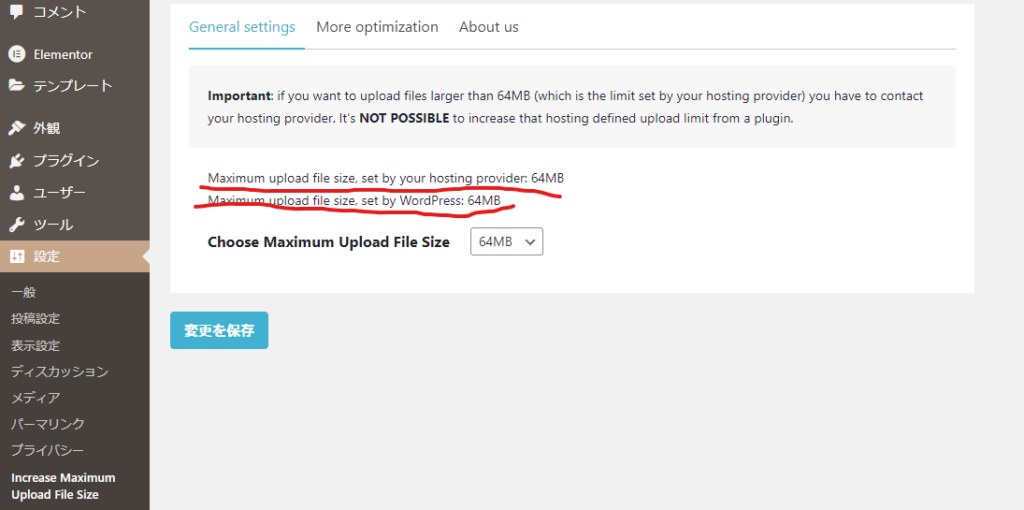
2,设置网站内部的上限
3,设置PHP的上限
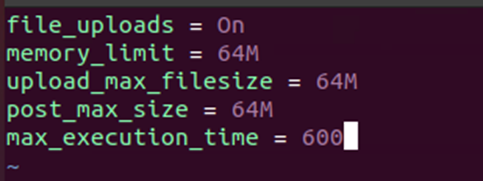
需要修改php.ini中的这些设置
如果是Docker的情况下,Php.ini是读取 /usr/local/etc/php/conf.d的文件,然后组成php.ini再执行的
操作如下


Hello world!
Welcome to WordPress. This is your first post. Edit or delete it, then start writing!
发表在 Uncategorized
留下评论